Welcome to Blog-Doc's preview!
The purpose of this post is to show you some screenshots taken from the front-end and the administration of Blog-Doc with some explanations.
This post contains a lot of important information about Blog-Doc in addition to the documentation.
The front-end
The blog
The blog displays a number of posts that you can control from:
Admin ⚡→ Settings → Site → Posts per page
The blog is paginated according to the defined number of posts per page.
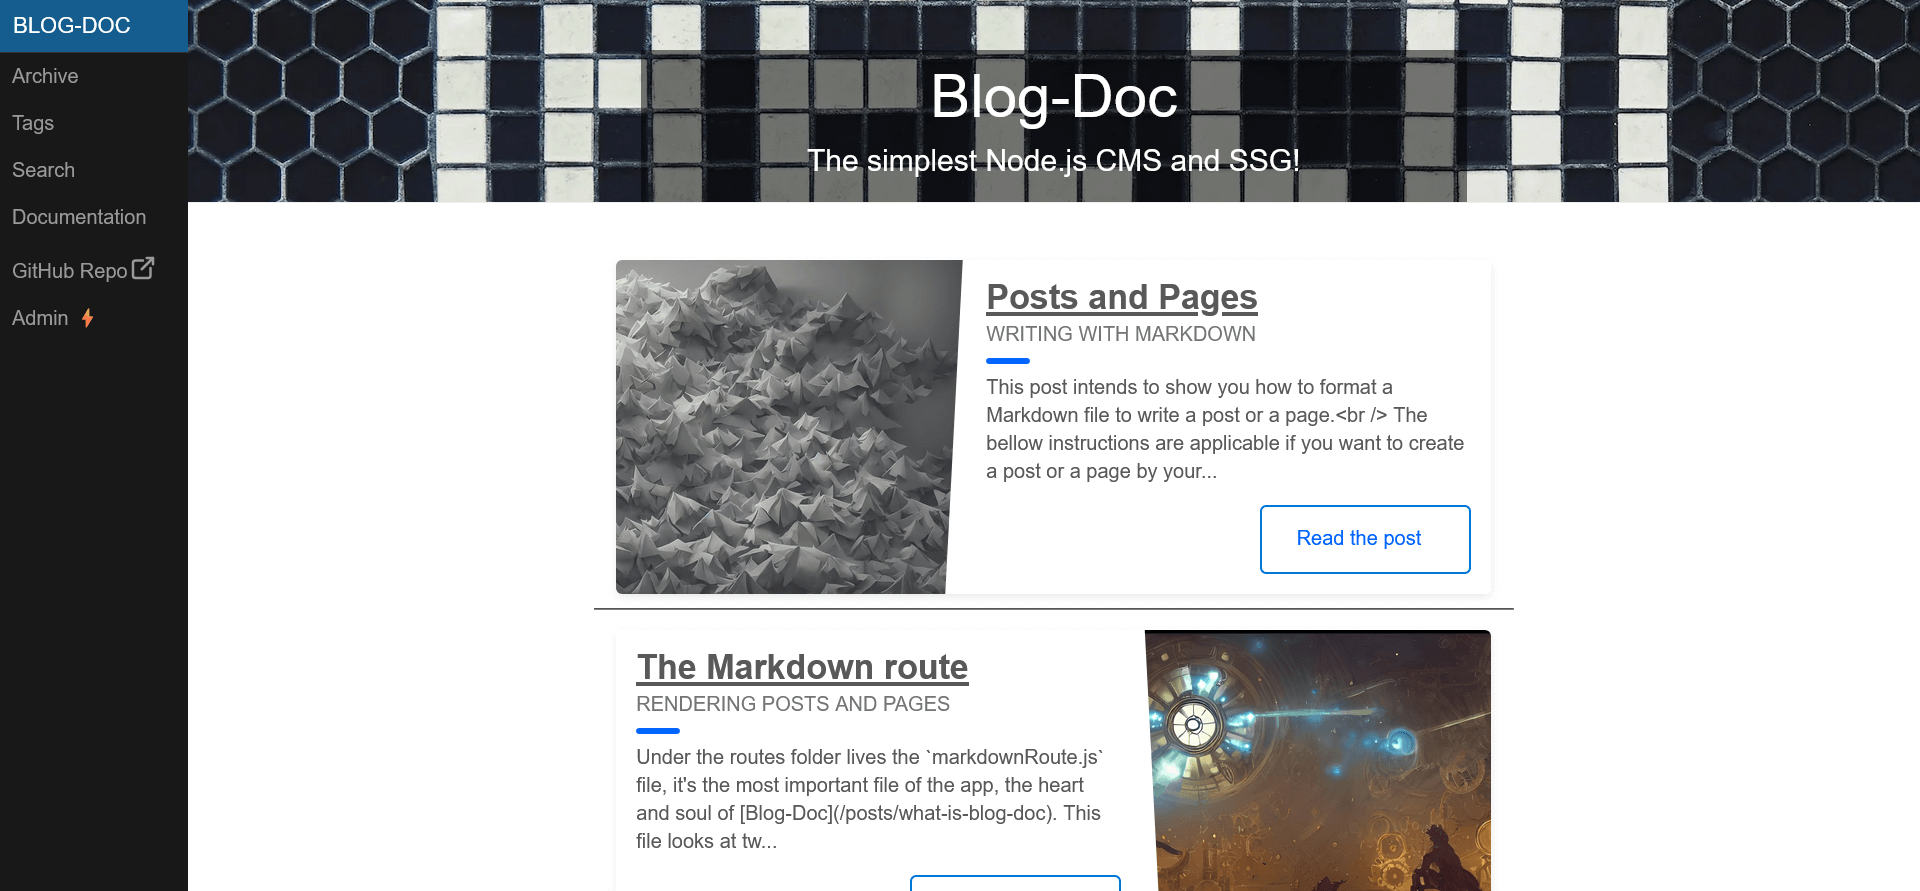
You can change the blog featured image from:
Admin ⚡→ Settings → Site → Change Blog Image
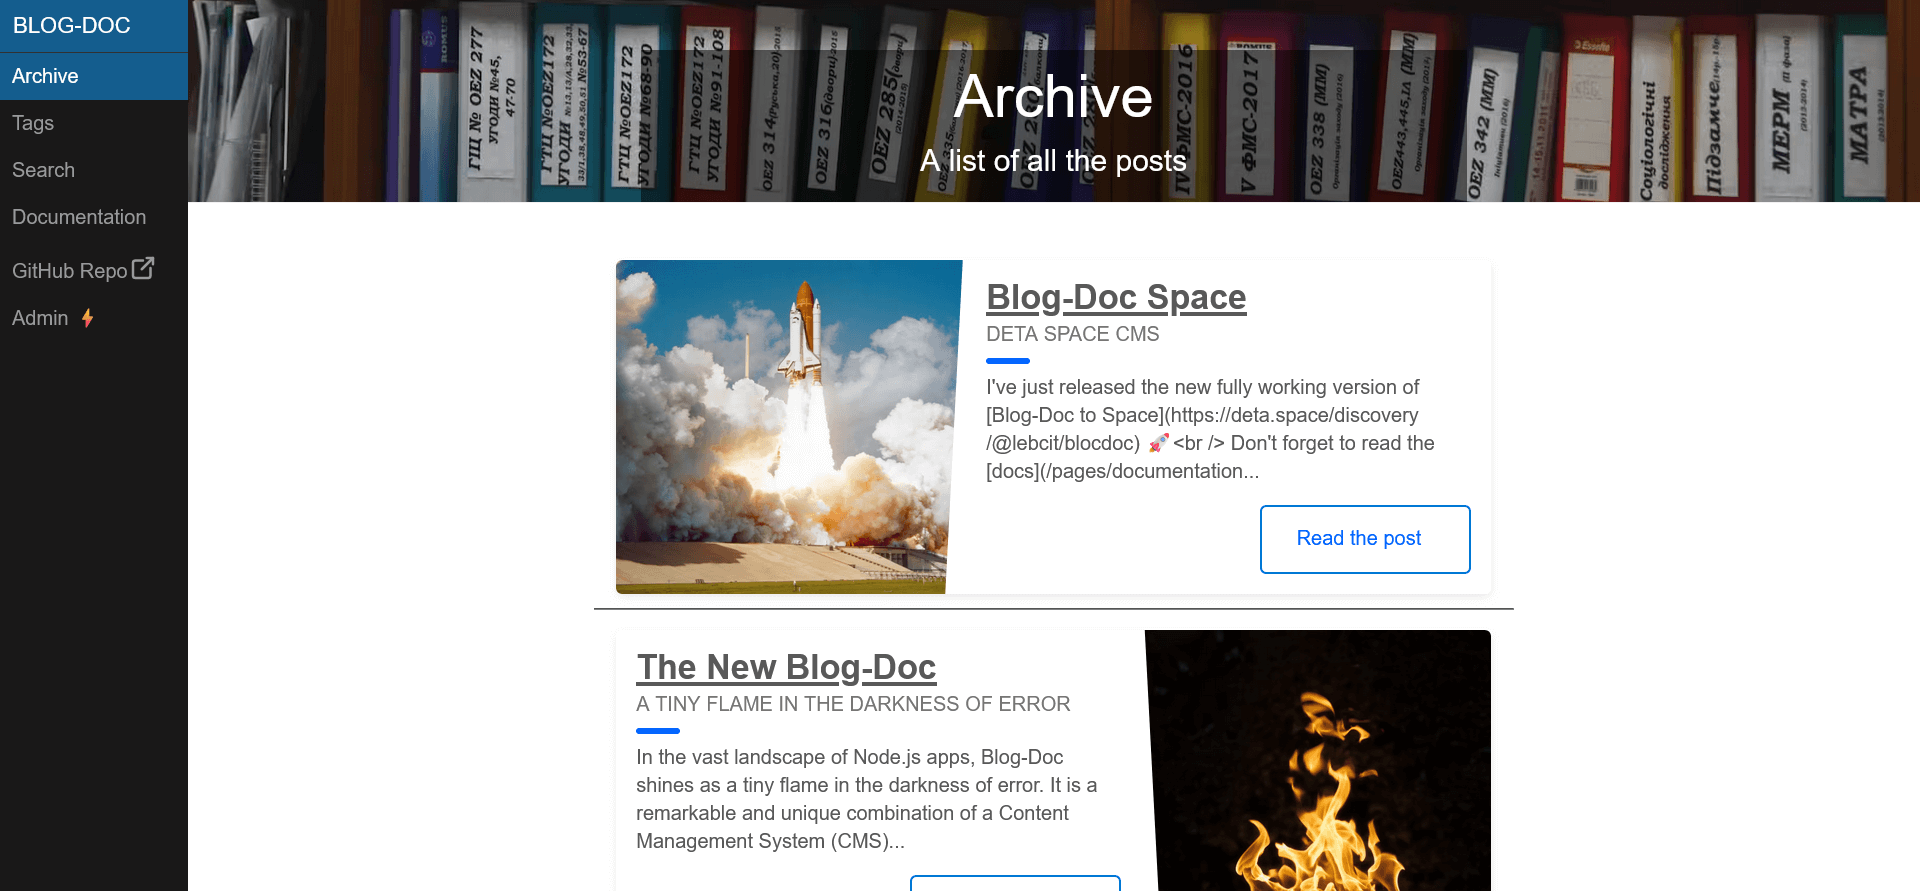
The archive
The archive page displays a list of all the posts.
You can change the archive featured image from:
Admin ⚡→ Settings → Site → Change Archive Image
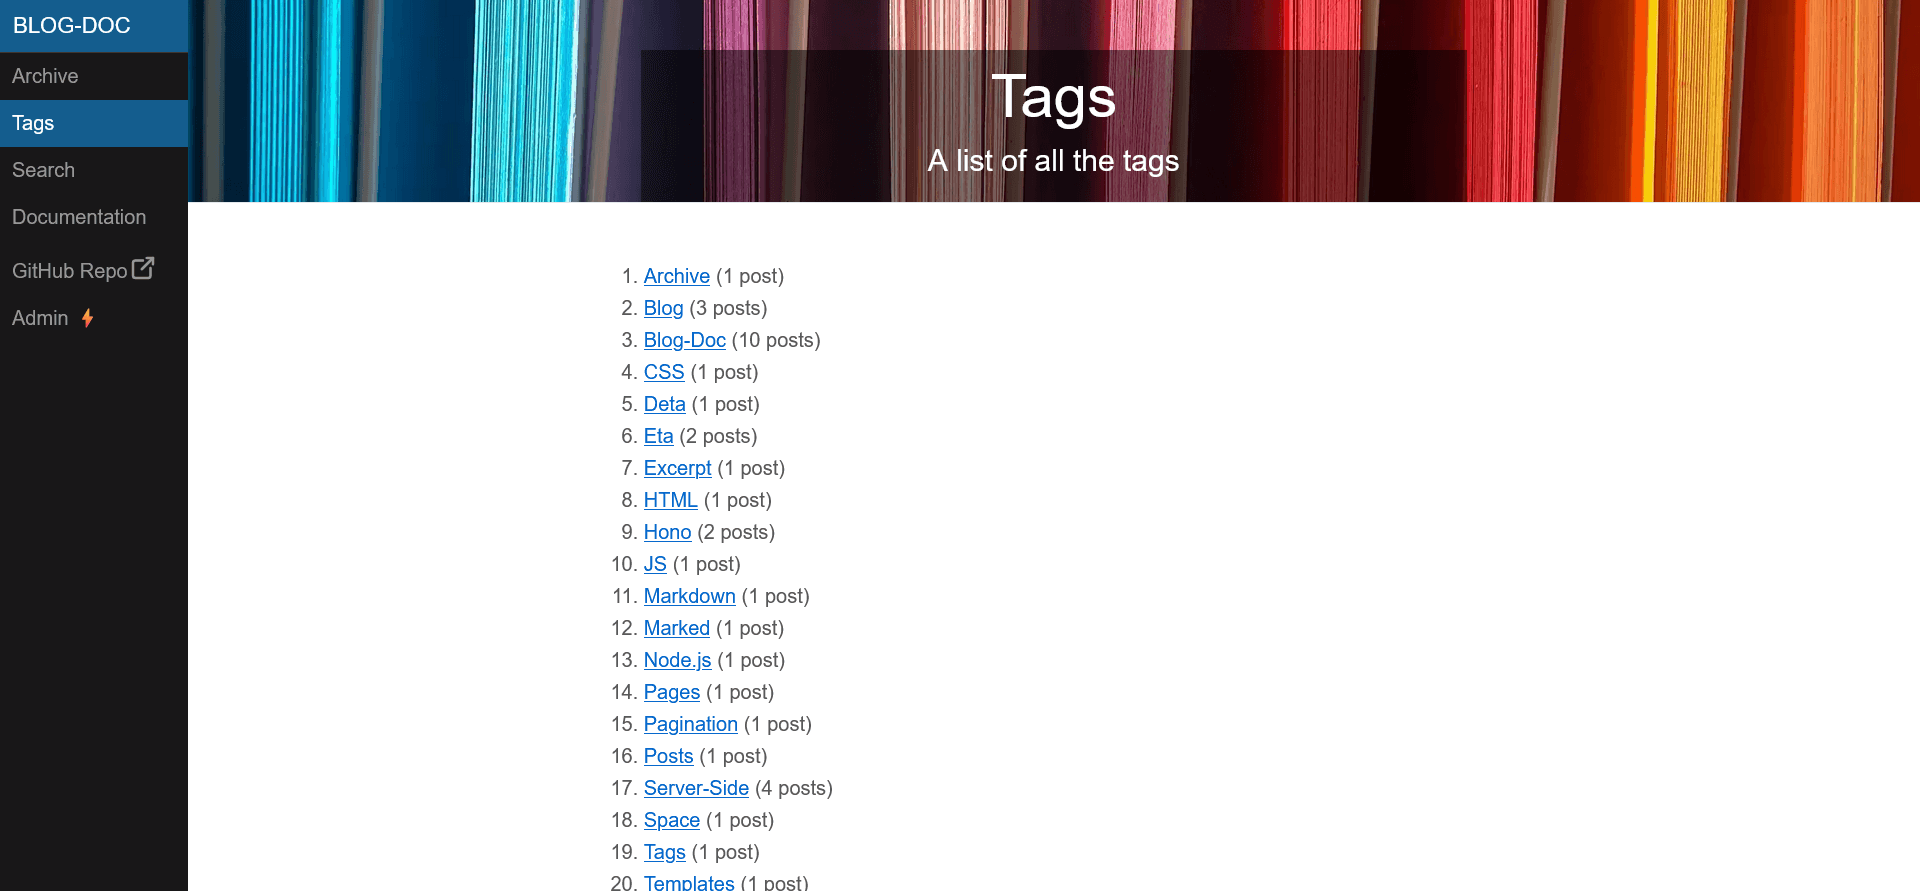
The tags
The tags page displays a list of all the tags.
In front of each tag is the number of posts tagged with this tag.
You can change the tags featured image from:
Admin ⚡→ Settings → Site → Change Tags Image
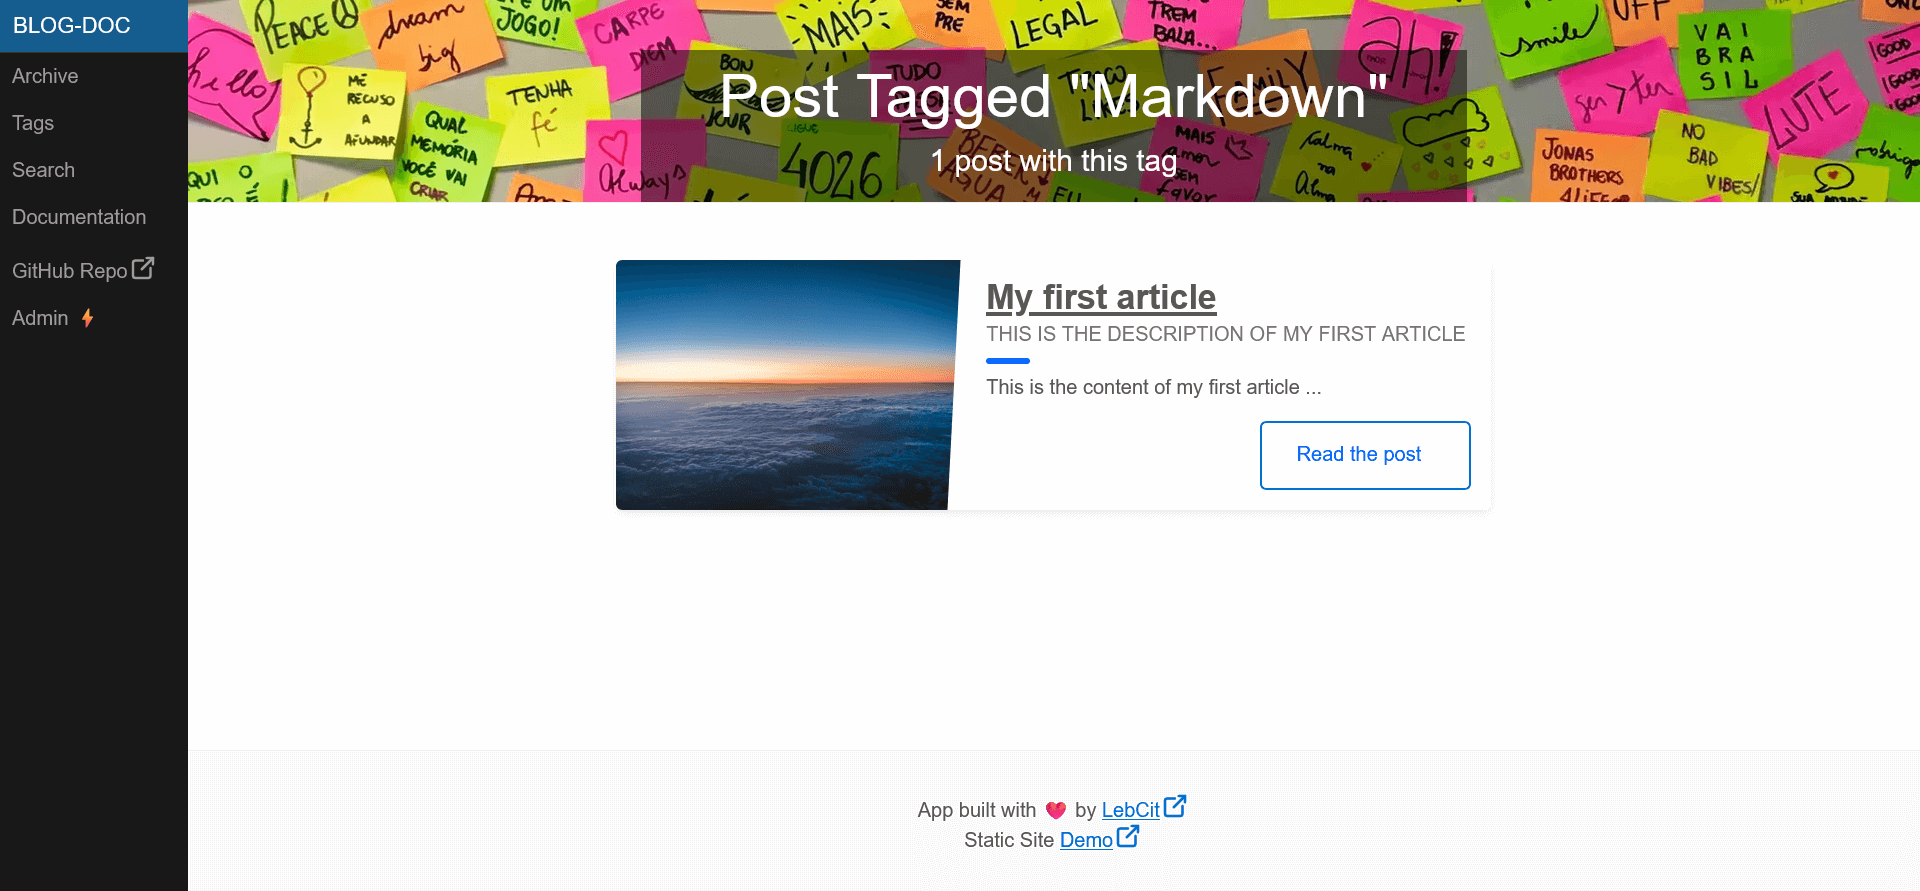
A single tag
Each tag page displays the posts tagged with this tag.
The number of posts tagged with this tag is displayed in the header of the page.
You can change the tag featured image from:
Admin ⚡→ Settings → Site → Change Tag Image
The search page
The search page allows a user to make a research on the titles and the contents of the posts.
You can enable or disable the search feature from:
Admin ⚡→ Settings → Site → Search feature
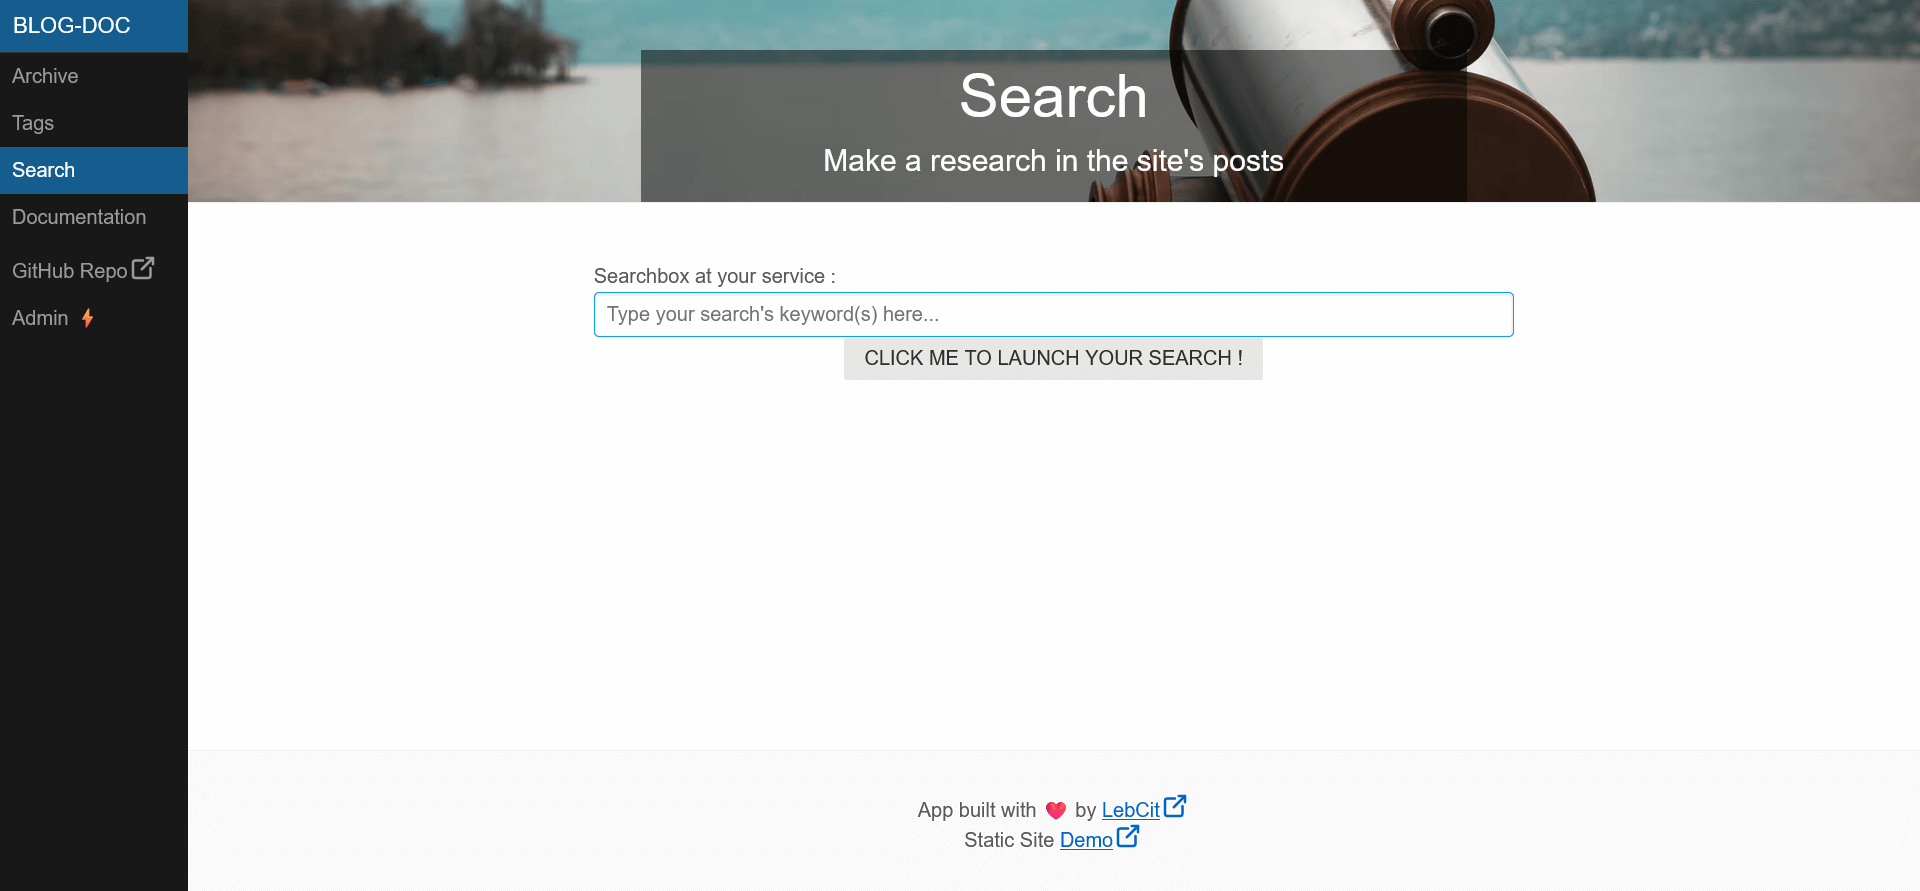
You can change the search featured image from:
Admin ⚡→ Settings → Site → Change Search Image
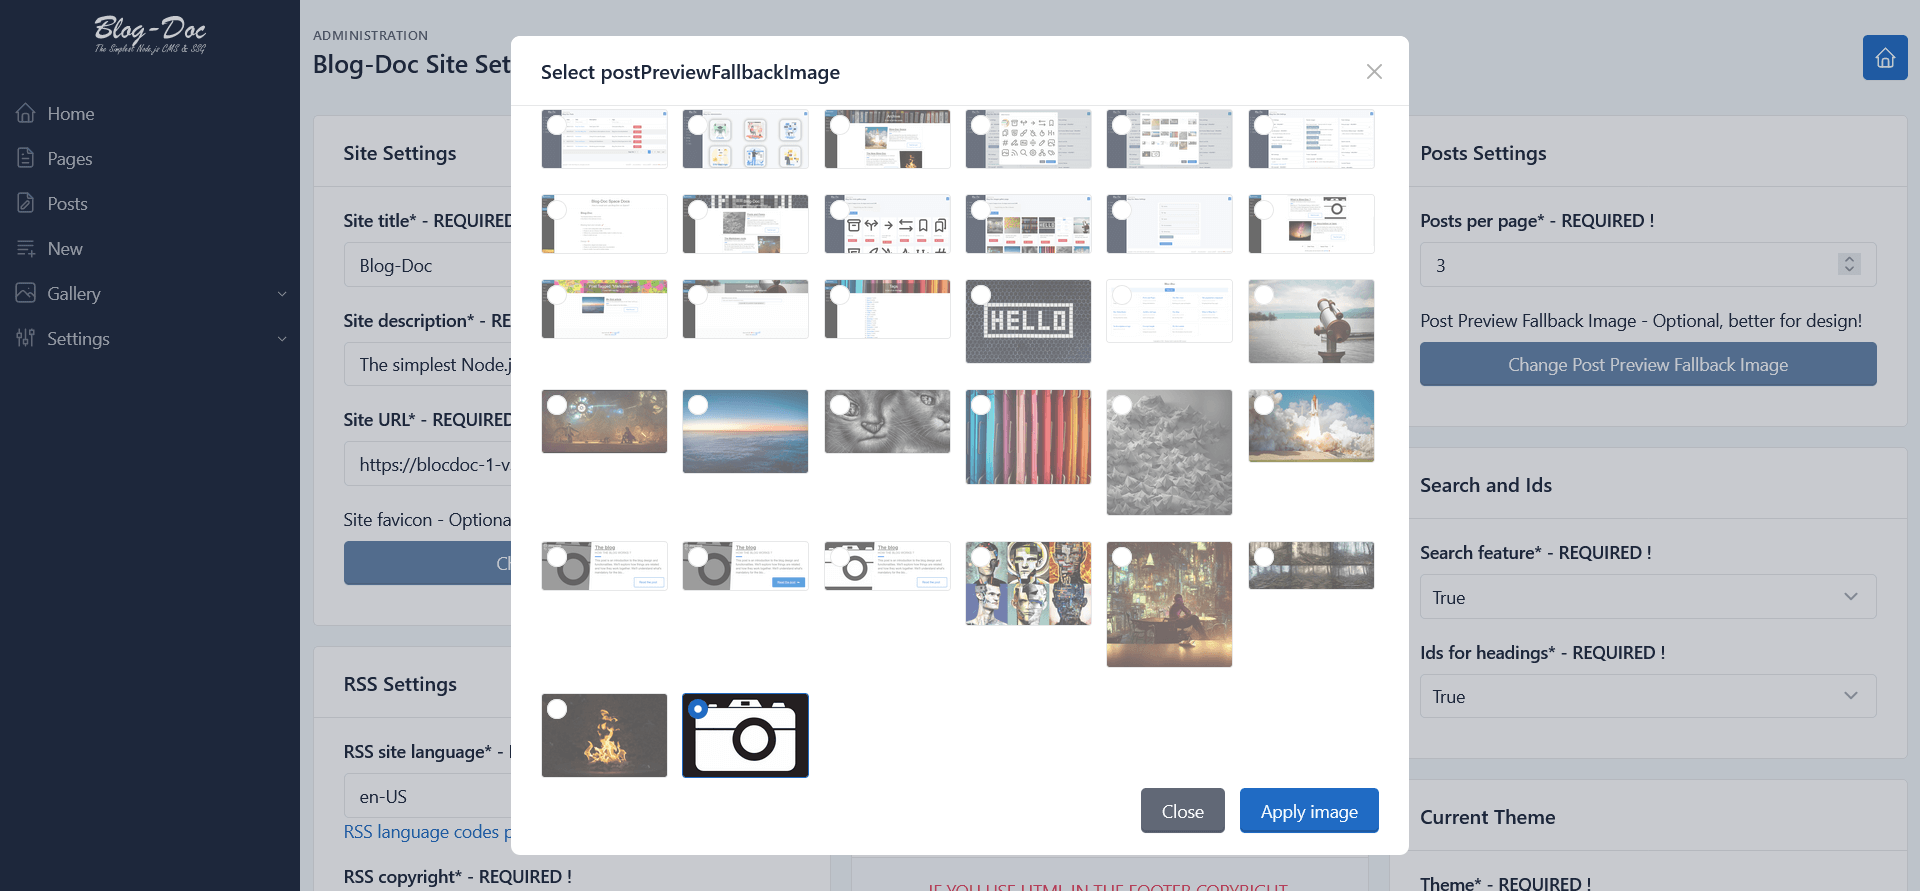
Post preview fallback image
When you create a post, you can give it a description, an image and some tag(s) or leave those fields empty.
If you don't assign a featured image to a post, a fallback image will be displayed.
The default fallback image is a white camera on a black background like the following one:
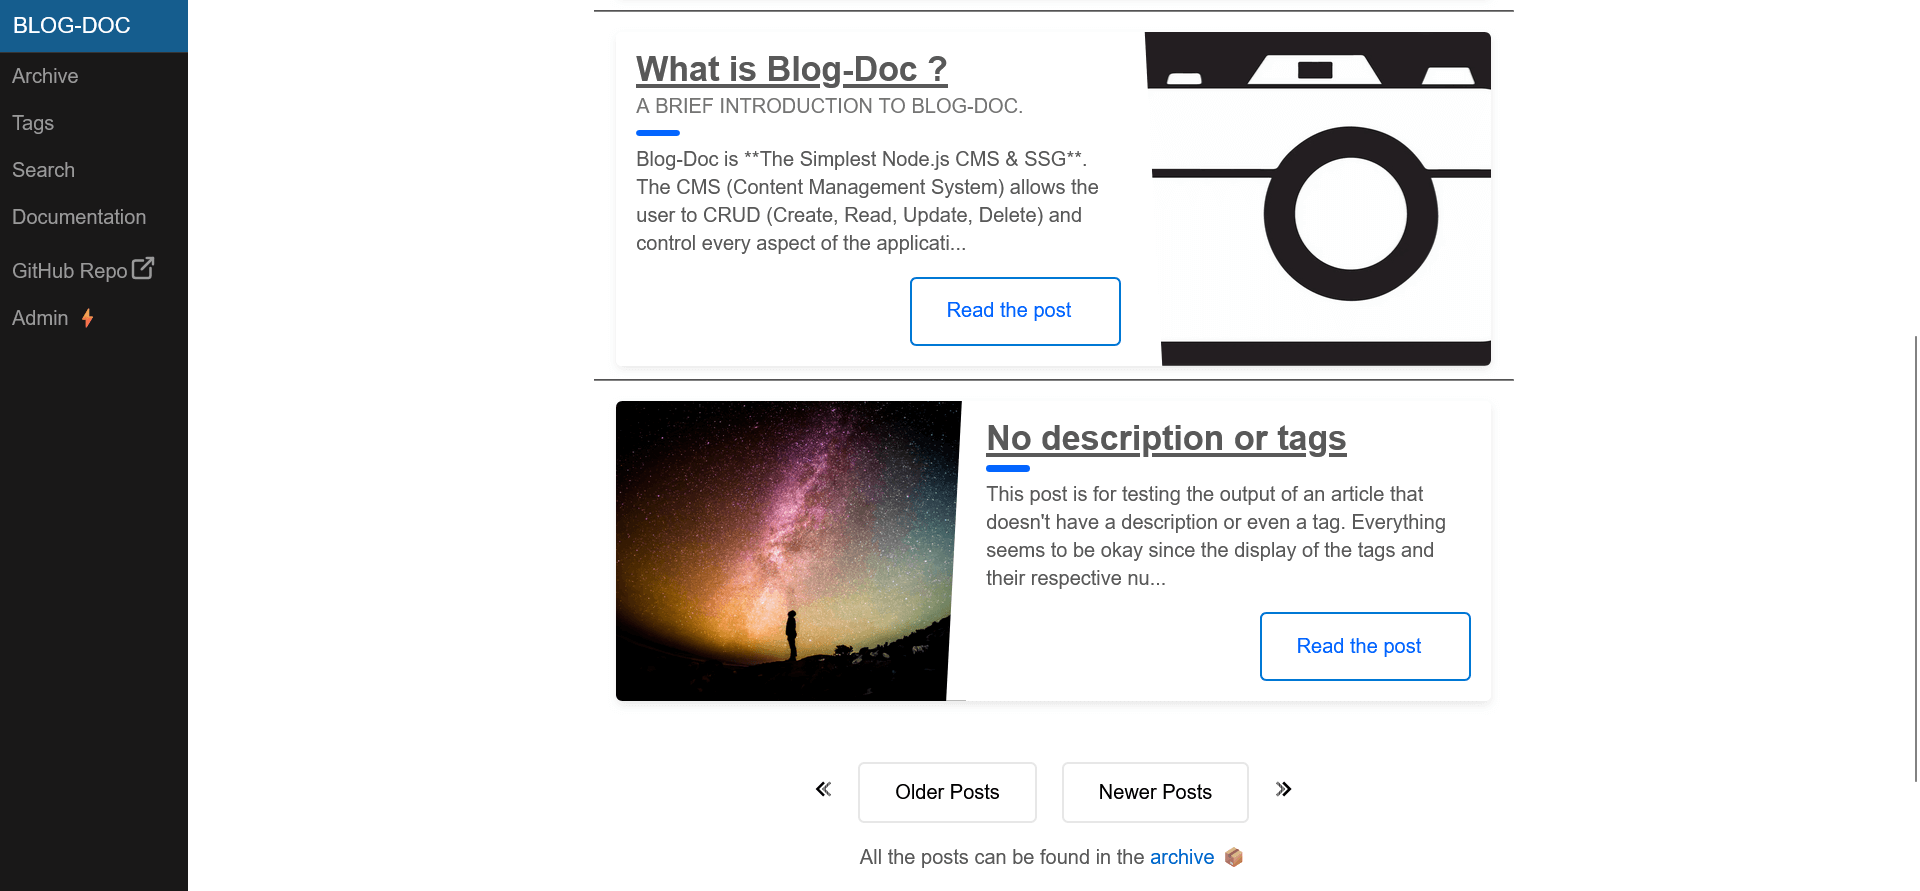
You can change the default post preview fallback image from:
Admin ⚡→ Settings → Site → Post Preview Fallback Image
The footer
As you can see in the screenshots from a single tag page and the search page, two links are displayed in the footer.
It's crucial to know that if you want to use some HTML tags in the footer, the attributes must be single quoted, otherwise you'll break the app!
You can change the default footer copyright from:
Admin ⚡→ Settings → Site → Footer Copyright
Ids for H2 till H4
In the footer paragraph above, I've used two hashtag links to make the user jump to a defined part of the page by an id on a header.
You can read everything you need to know about this feature in the documentation.
You can enable or disable the Ids for headings feature from:
Admin ⚡→ Settings → Site → Ids for headings
The favicon
The favicon is the little image displayed at the top left of the browser's tab, you can think of it as a graphical identity for a site.
You can change the default favicon of Blog-Doc from:
Admin ⚡→ Settings → Site → Site favicon
The administration
Admin homepage
In the global spirit of Blog-Doc, its homepage administration is simple and easy to use.
To access Blog-Doc's administration, click on the Admin ⚡ link.
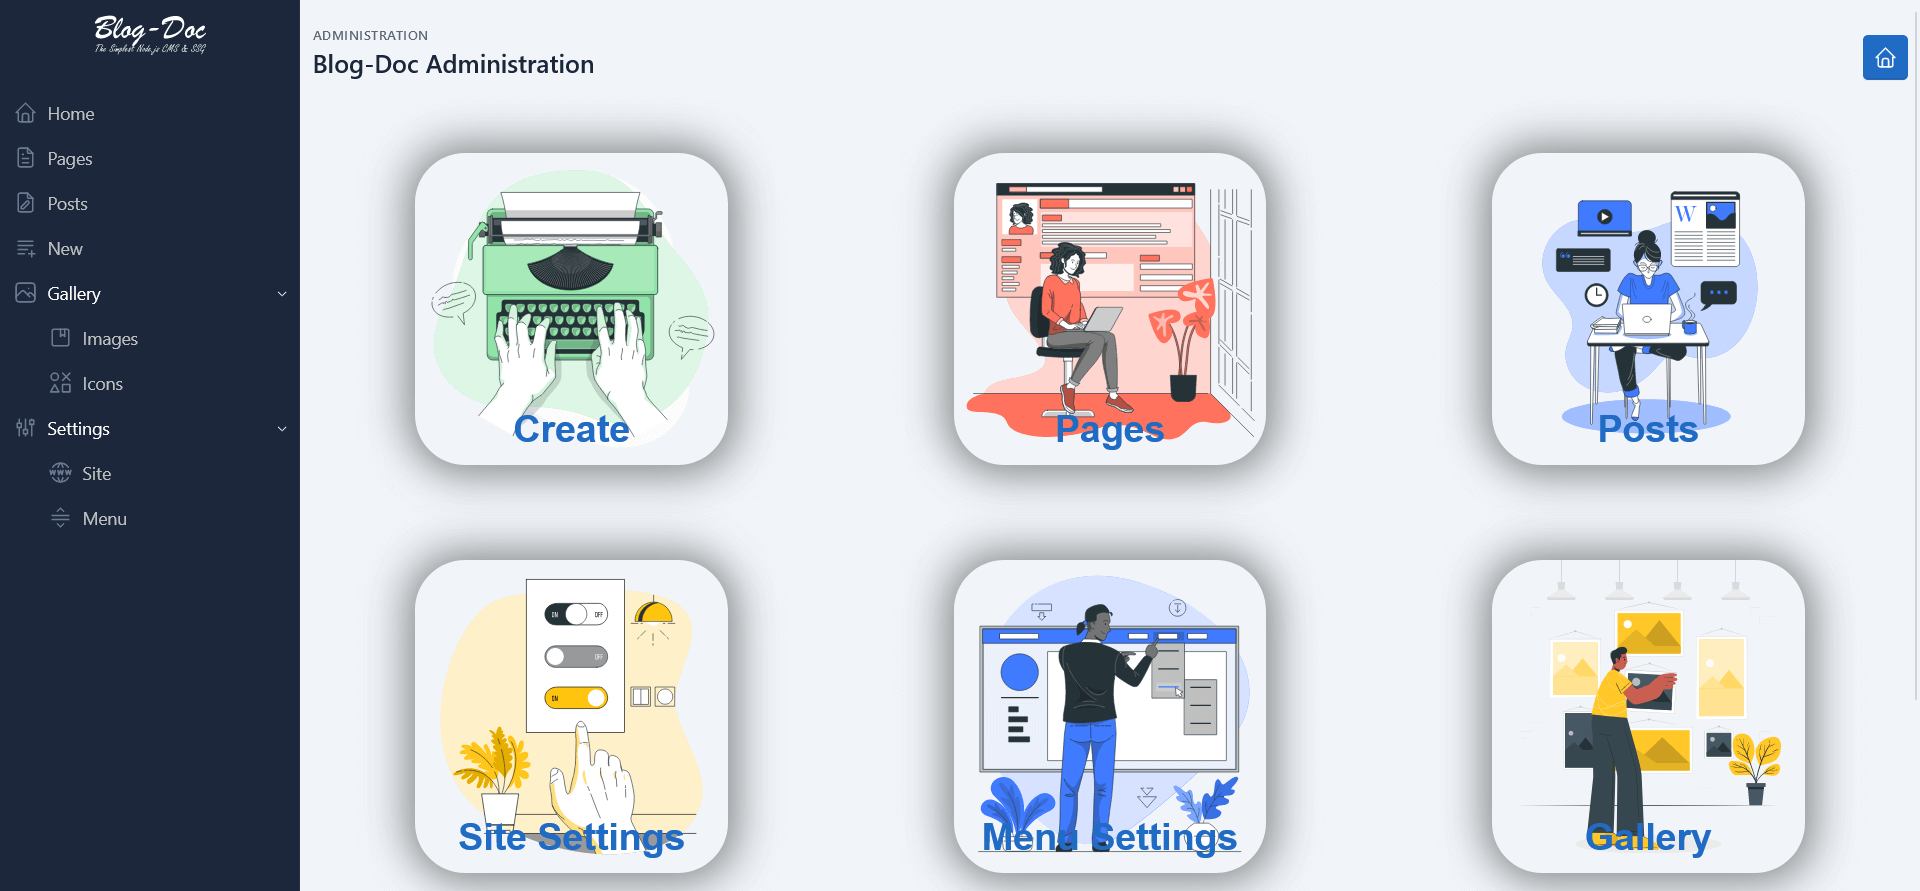
Please note that the home link and the home icon are not for the administration homepage but to get back to the front-end.
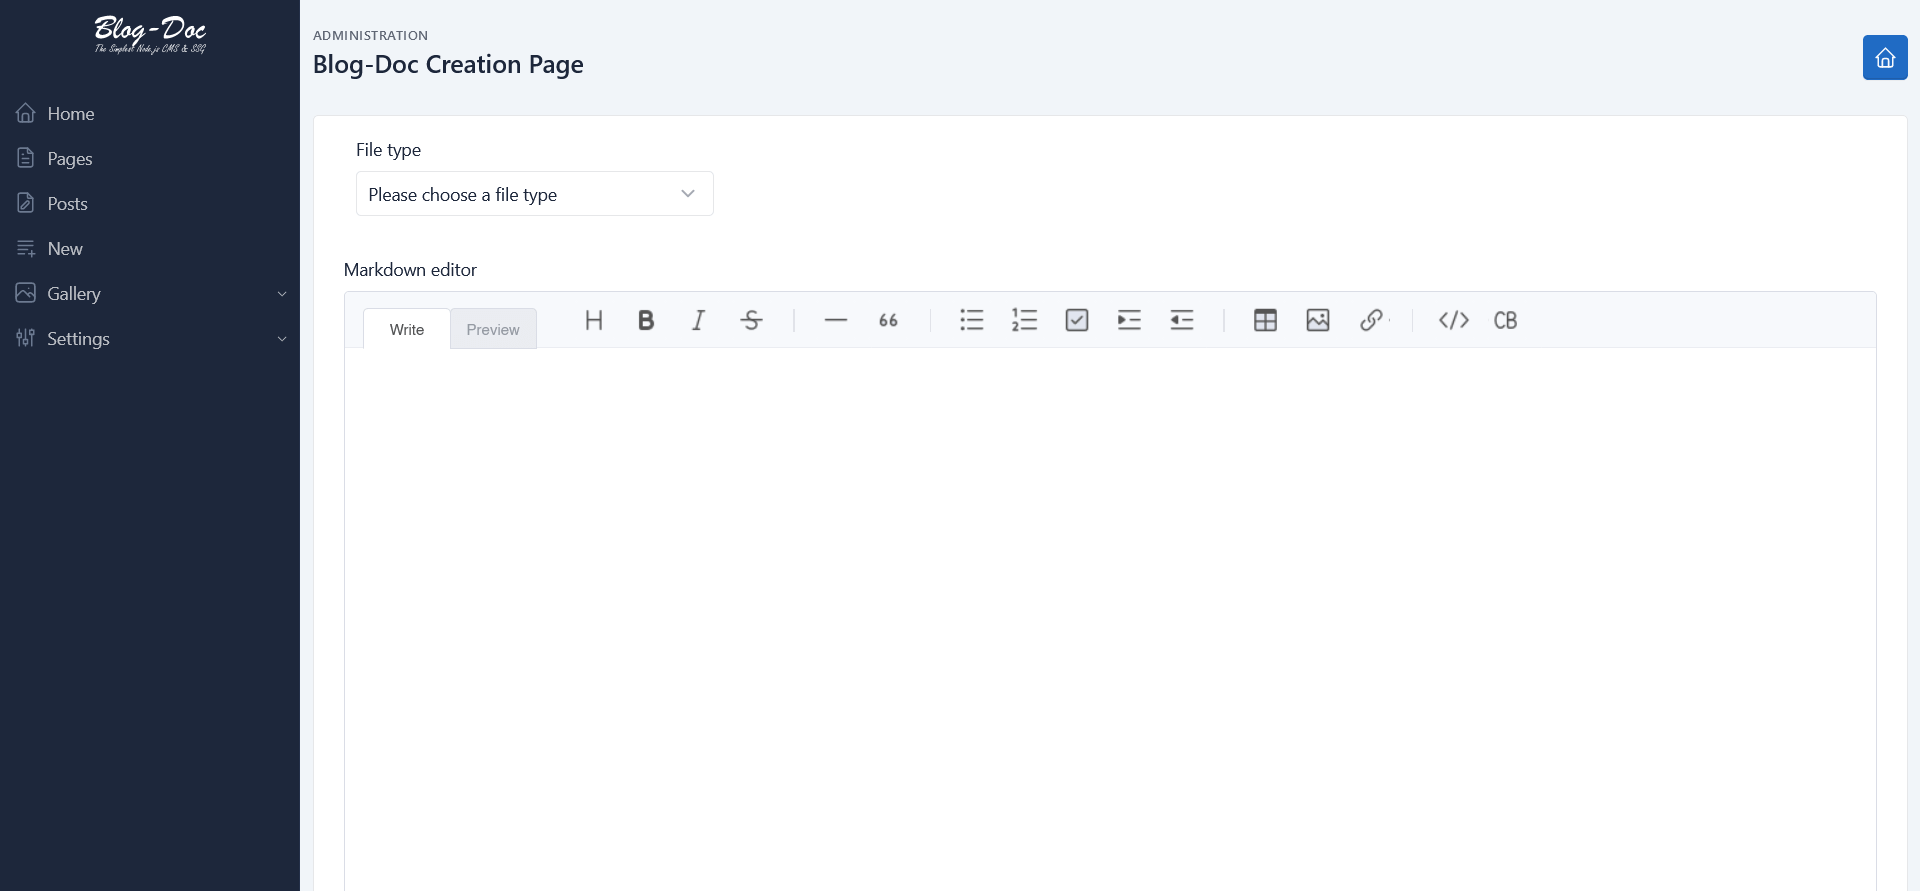
Admin create
To create a page or a post, click on the Create card or the New link, choose the file type and proceed.
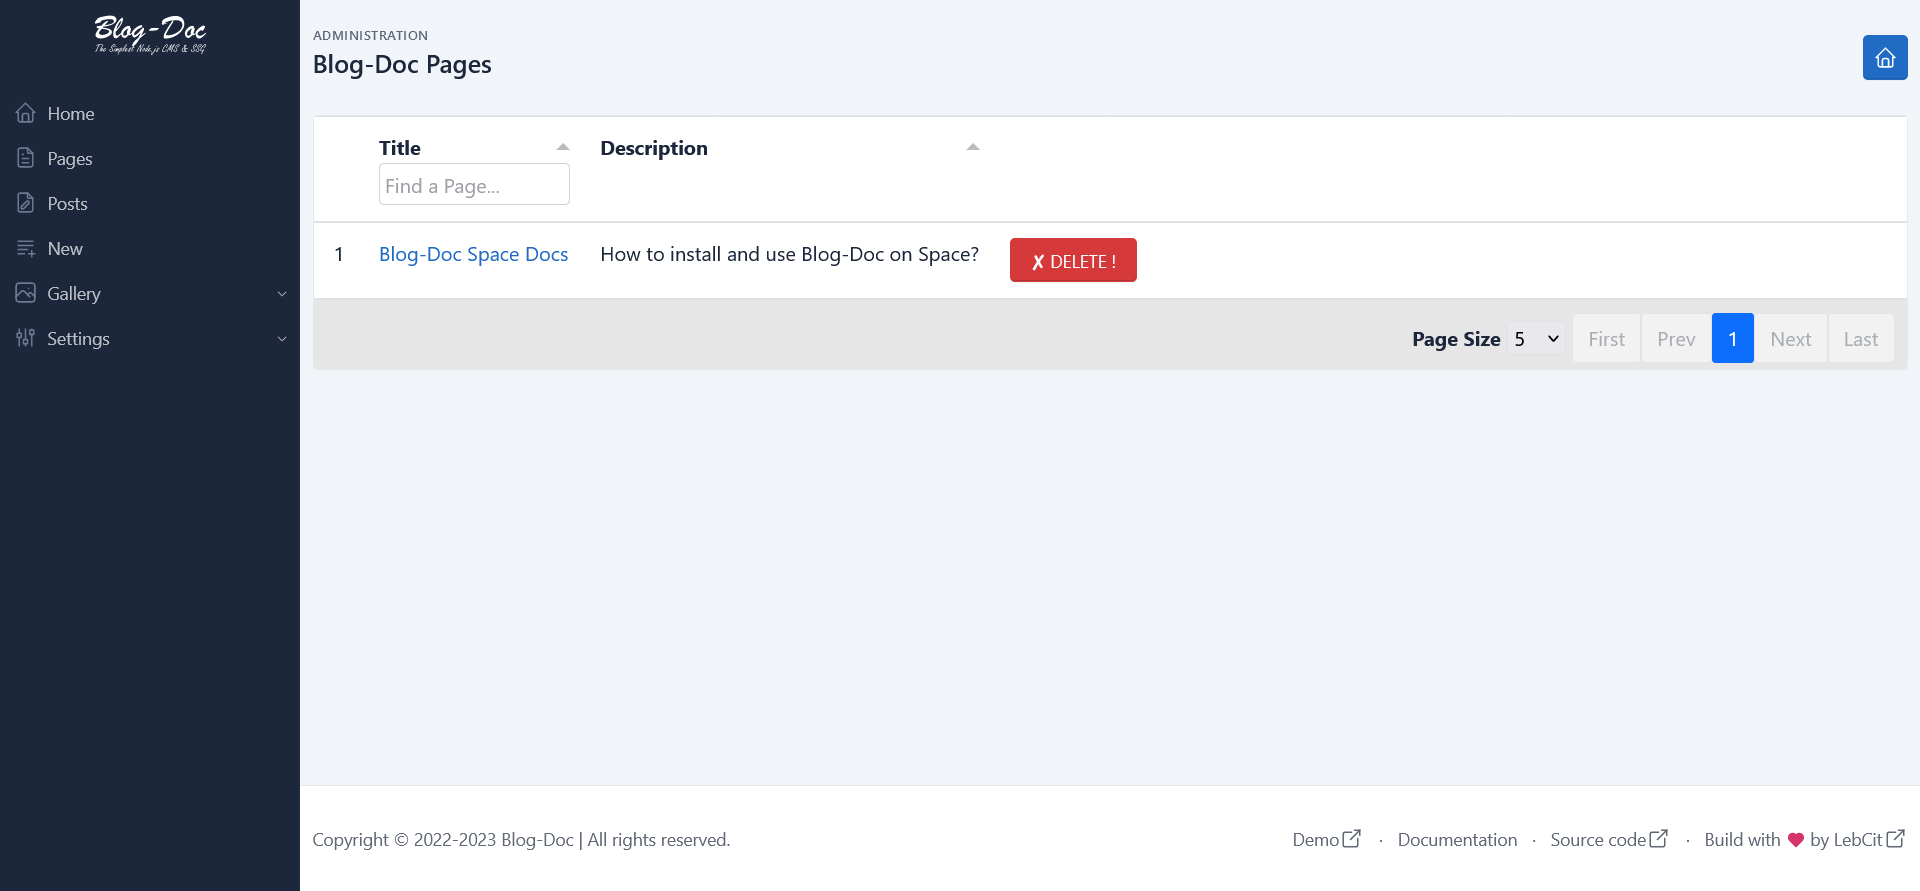
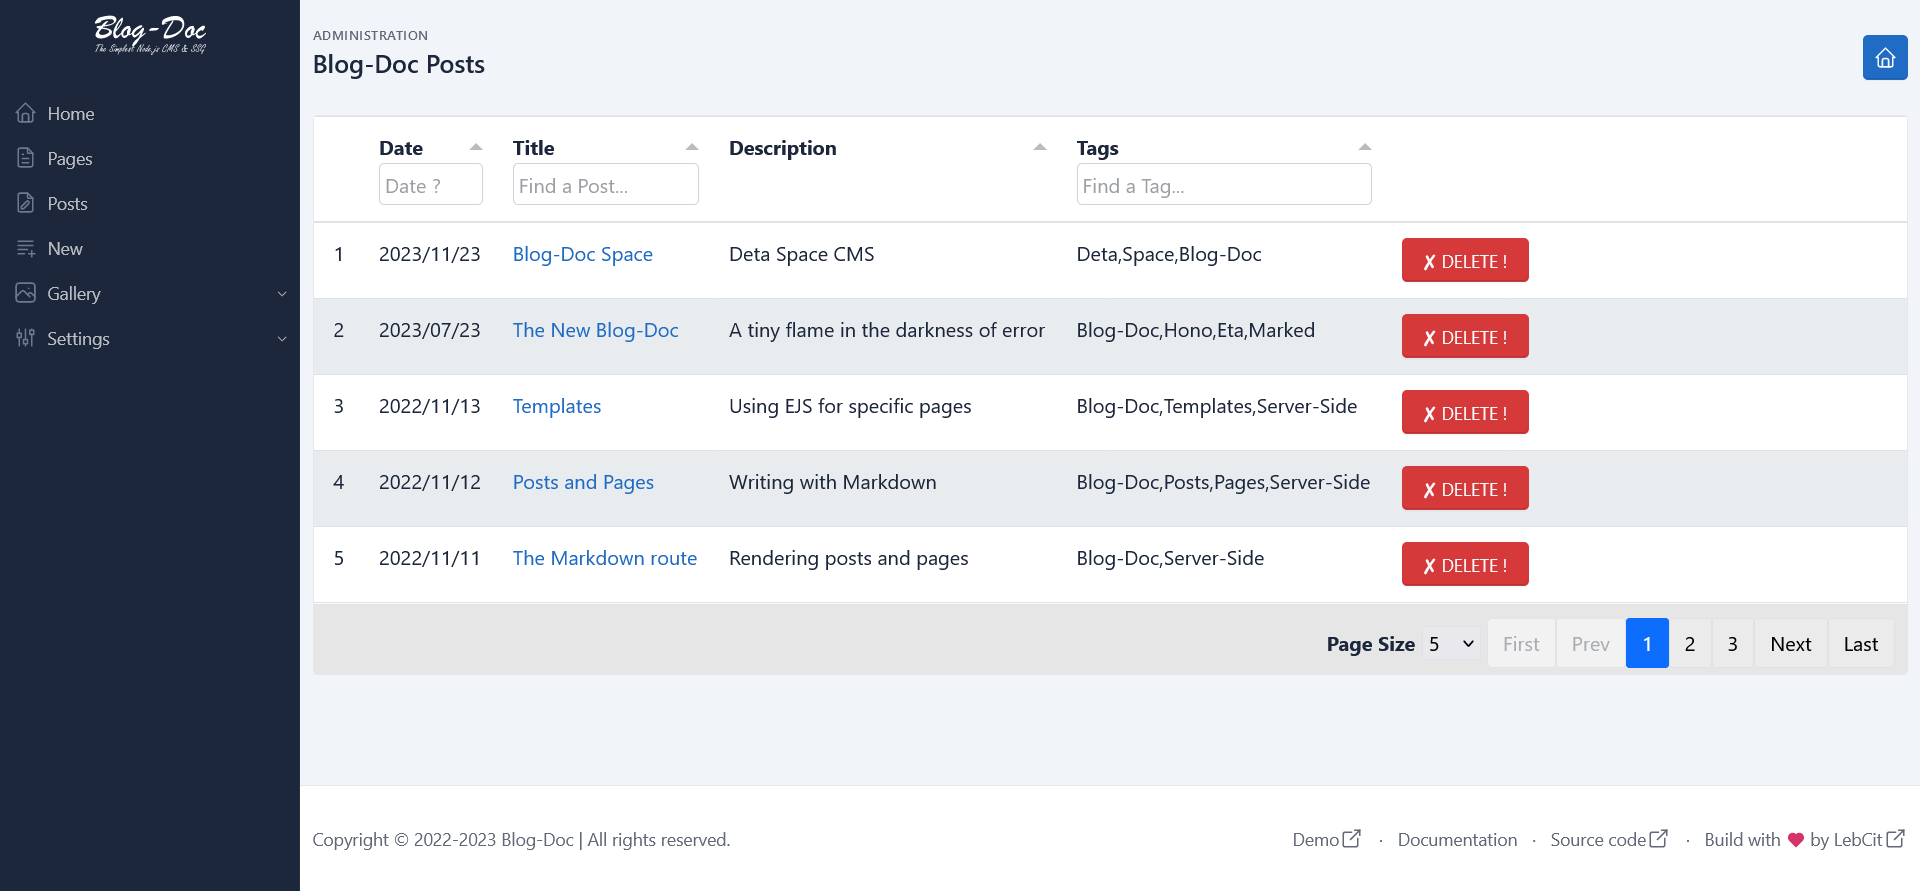
Pages and posts
The Pages and Posts cards and links take you respectively to a table displaying the available pages and posts from where you can edit or delete them.
Galleries
Under the Gallery link, you can access the Images gallery and the Icons one.
The Gallery card redirects to the Images gallery.
From the galleries, you can upload the icons and images that you want to use in the application or just delete them.
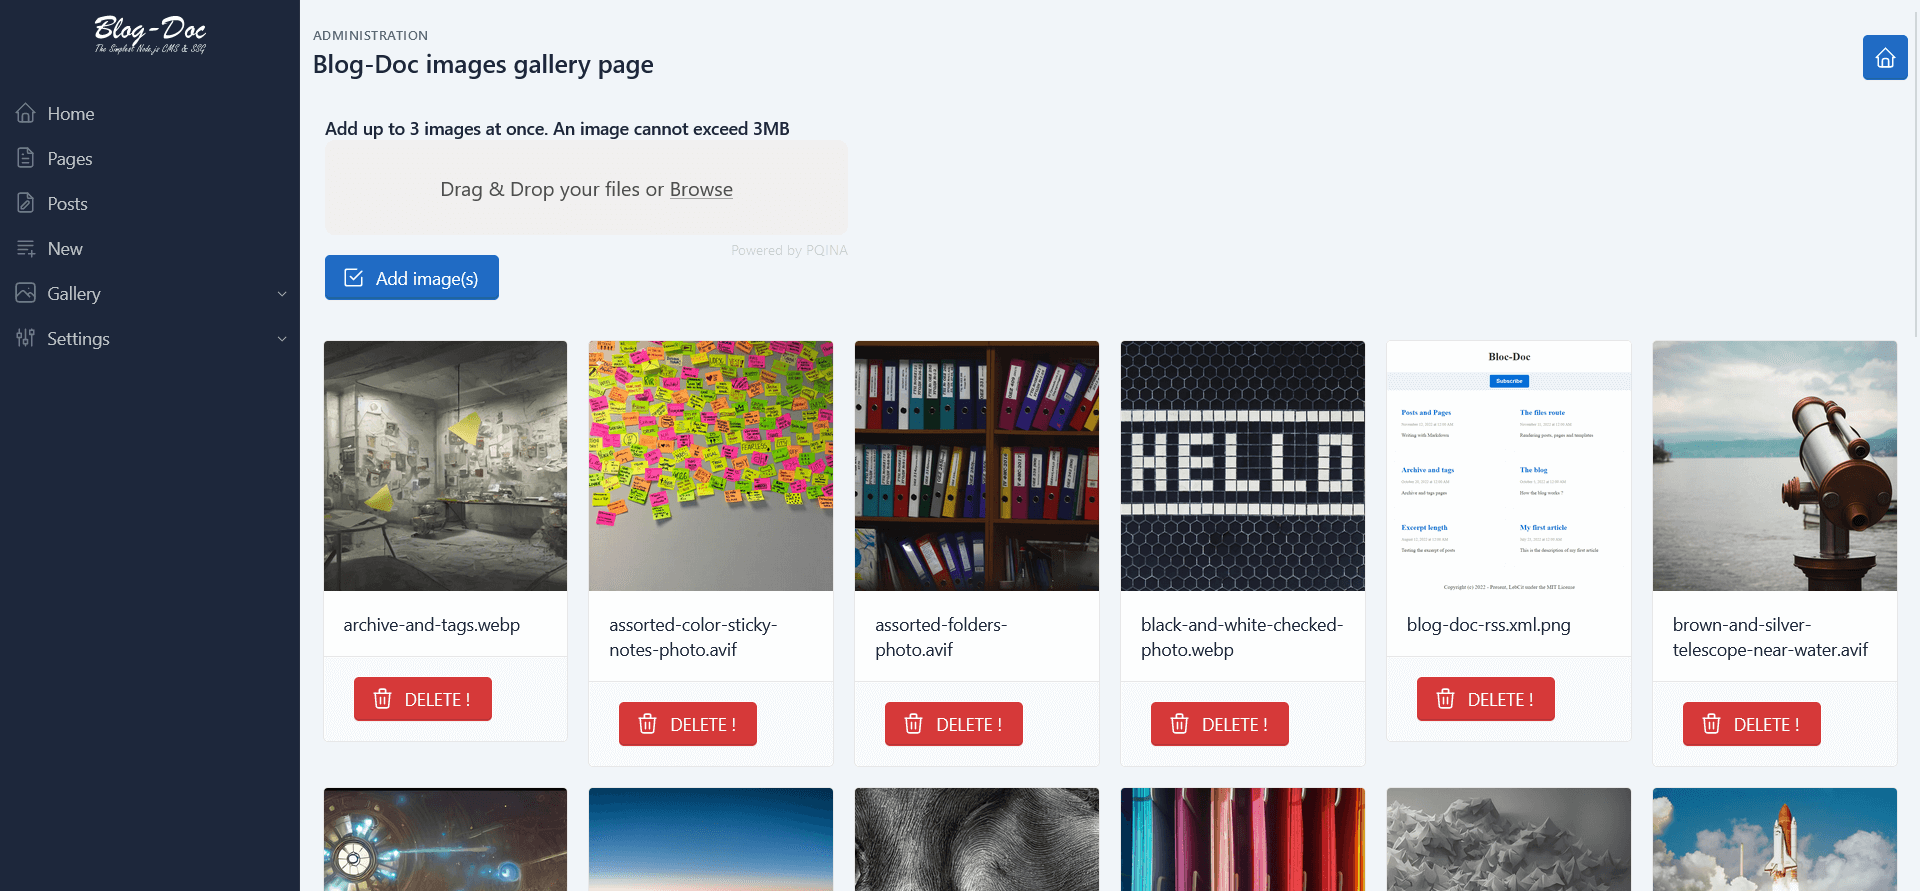
To link to an icon or an image from a page or a post, the source should always be
/static/icon/icon-filename or /static/image/image-filename
like the following example:
<!-- Fetching an icon from the icons into a page or a post -->
<img src="/static/icons/settings.svg" alt="Settings icon">

<!-- Fetching an image from the images into a page or a post -->
<img src="/static/images/bd-menu-settings.png" alt="Screenshot of Blog-Doc administration page to manage the menu">
Yes you can use HTML inside a page or a post!
Site settings
Most of those settings have been cover in the front-end sub-sections. You should also read the documentation for a global view and better understanding of Blog-Doc features.
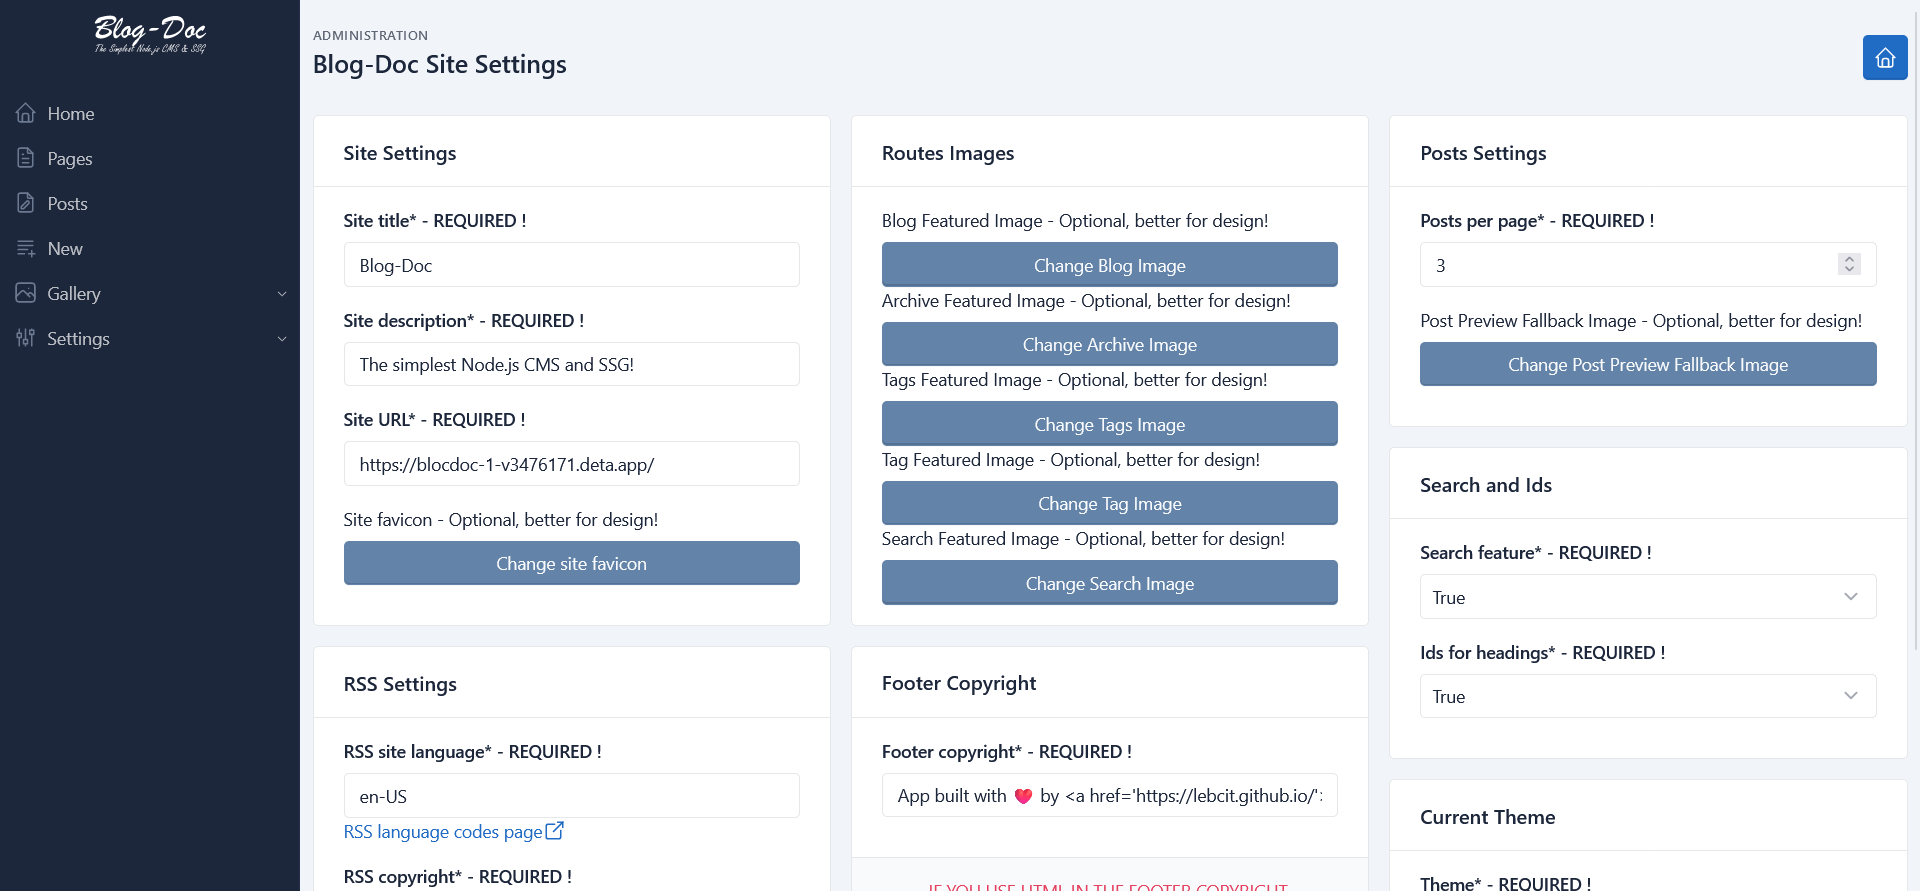
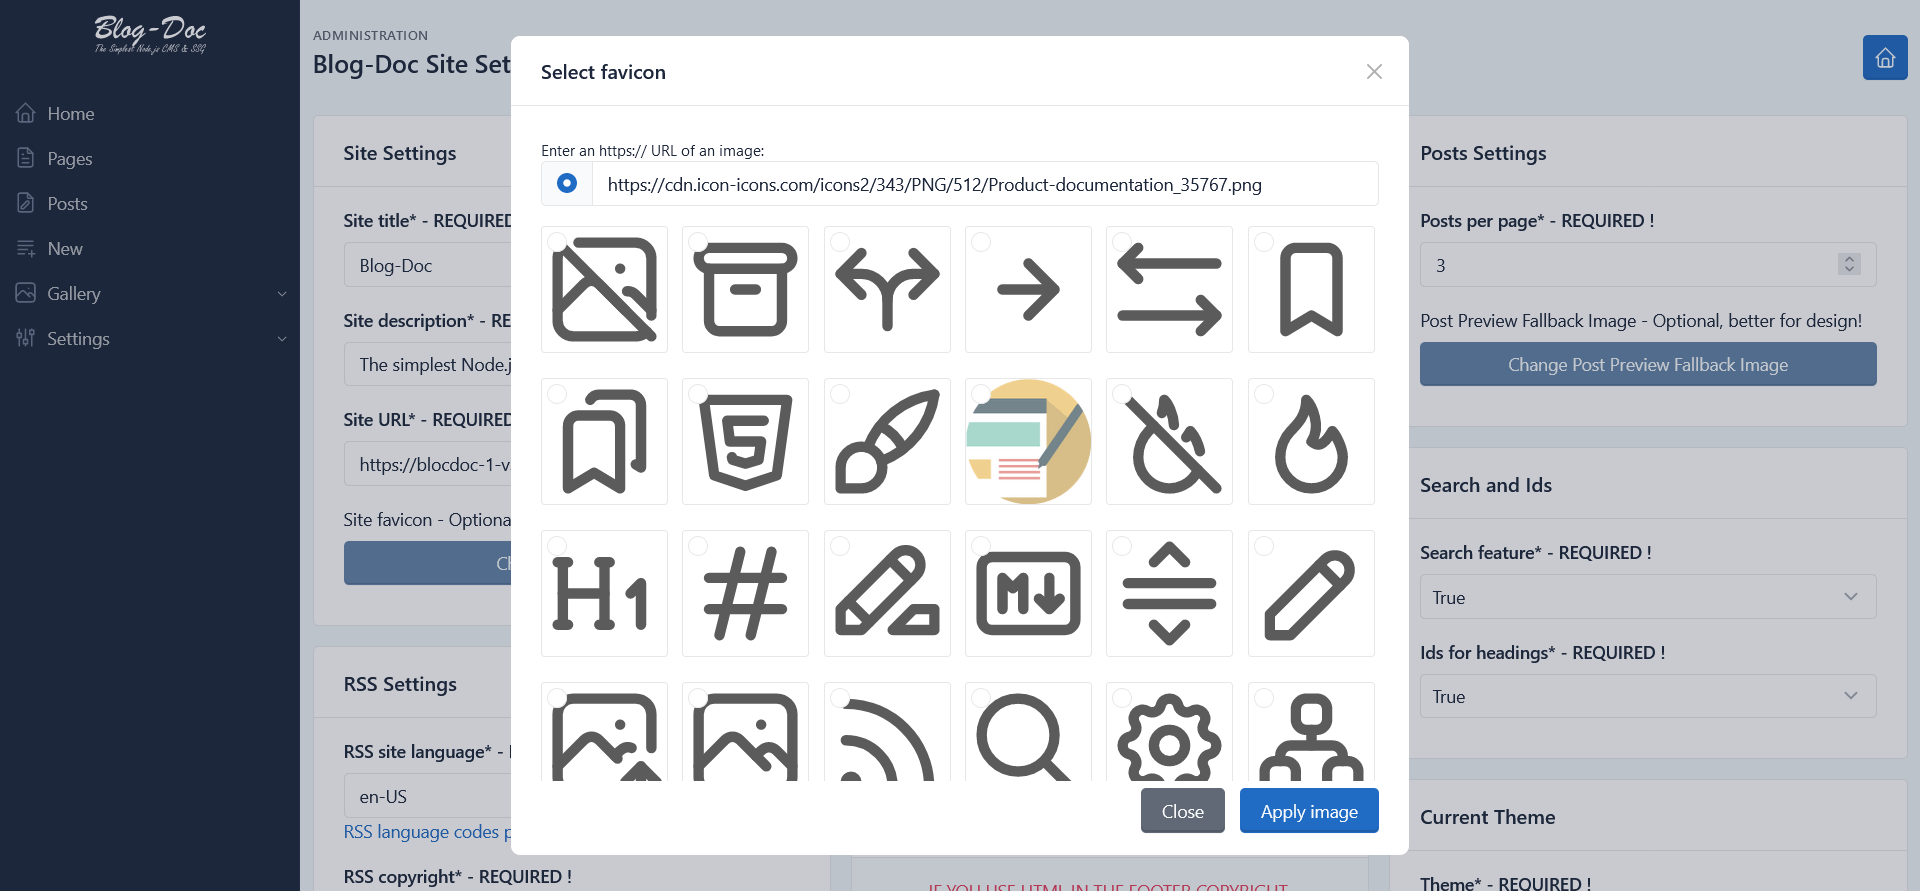
When you create a page or a post or change any image, keep in mind that you have the possibility to select the following icon to display a blank background instead of an image.
You can also use the URL input, located at the top of a gallery's modal, to fetch an image from an external source without including it in a gallery.
Menu settings
One of my favorite features in Blog-Doc!
Create menu items, delete menu items, reorder them as you want, it just works!
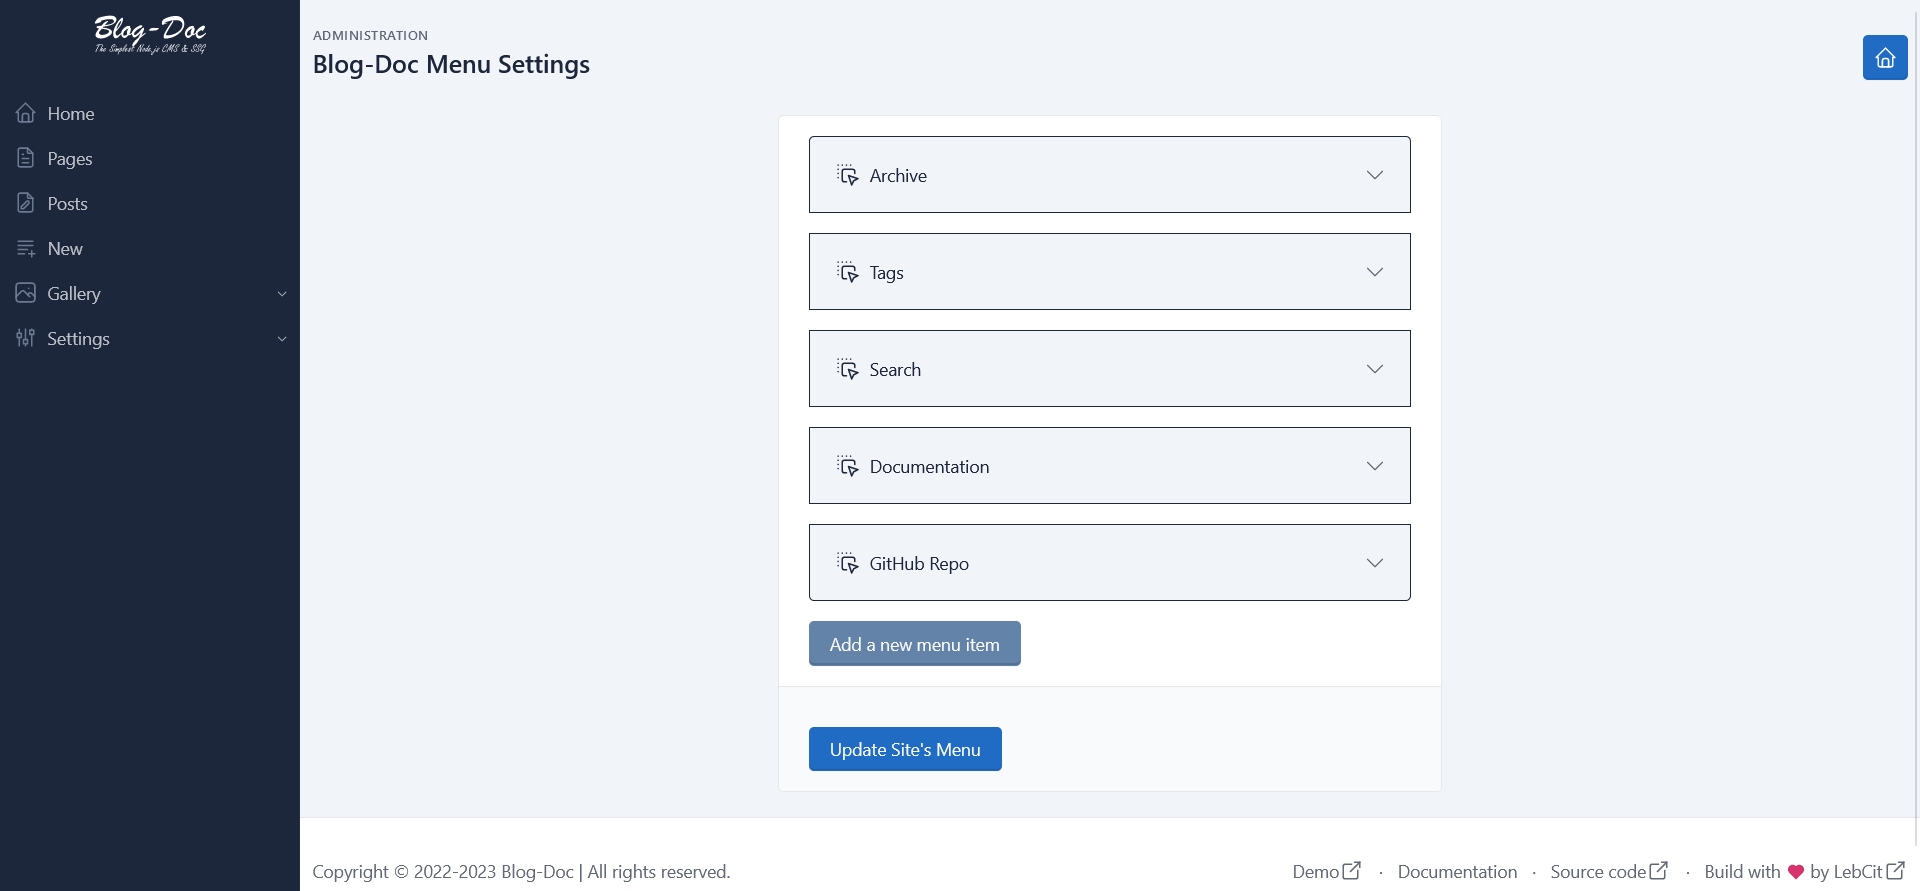
Keep in mind the following:
- The links of the main routes,
posts,tagsandsearch, must not be modified, their title can be changed to whatever you like, and if you don't want them just delete them, you'll be able to recreate them whenever you want. - To link to a page, the link must be
pages/the-page-title-in-lowercase - To link to a post, the link must be
posts/the-post-title-in-lowercase - To link to an external link on the web, just paste its link in the Link target field
And that's the end of Blog-Doc's preview!
SYA ✋
LebCit